Setting Up EC2 for DeepSeek R1 with Nvidia Drivers and TypingMind Integration
Set up DeepSeek R1 on AWS EC2 with Nvidia GPUs. This guide covers EC2 setup, installing Ollama and DeepSeek, configuring Nginx, and integrating with TypingMind.
If you’re aiming to set up DeepSeek R1 on an EC2 instance, leveraging the Nvidia GPU drivers for high-performance computing, this guide will walk you through the entire process, from EC2 configuration to TypingMind integration.
Step 1: EC2 Configuration
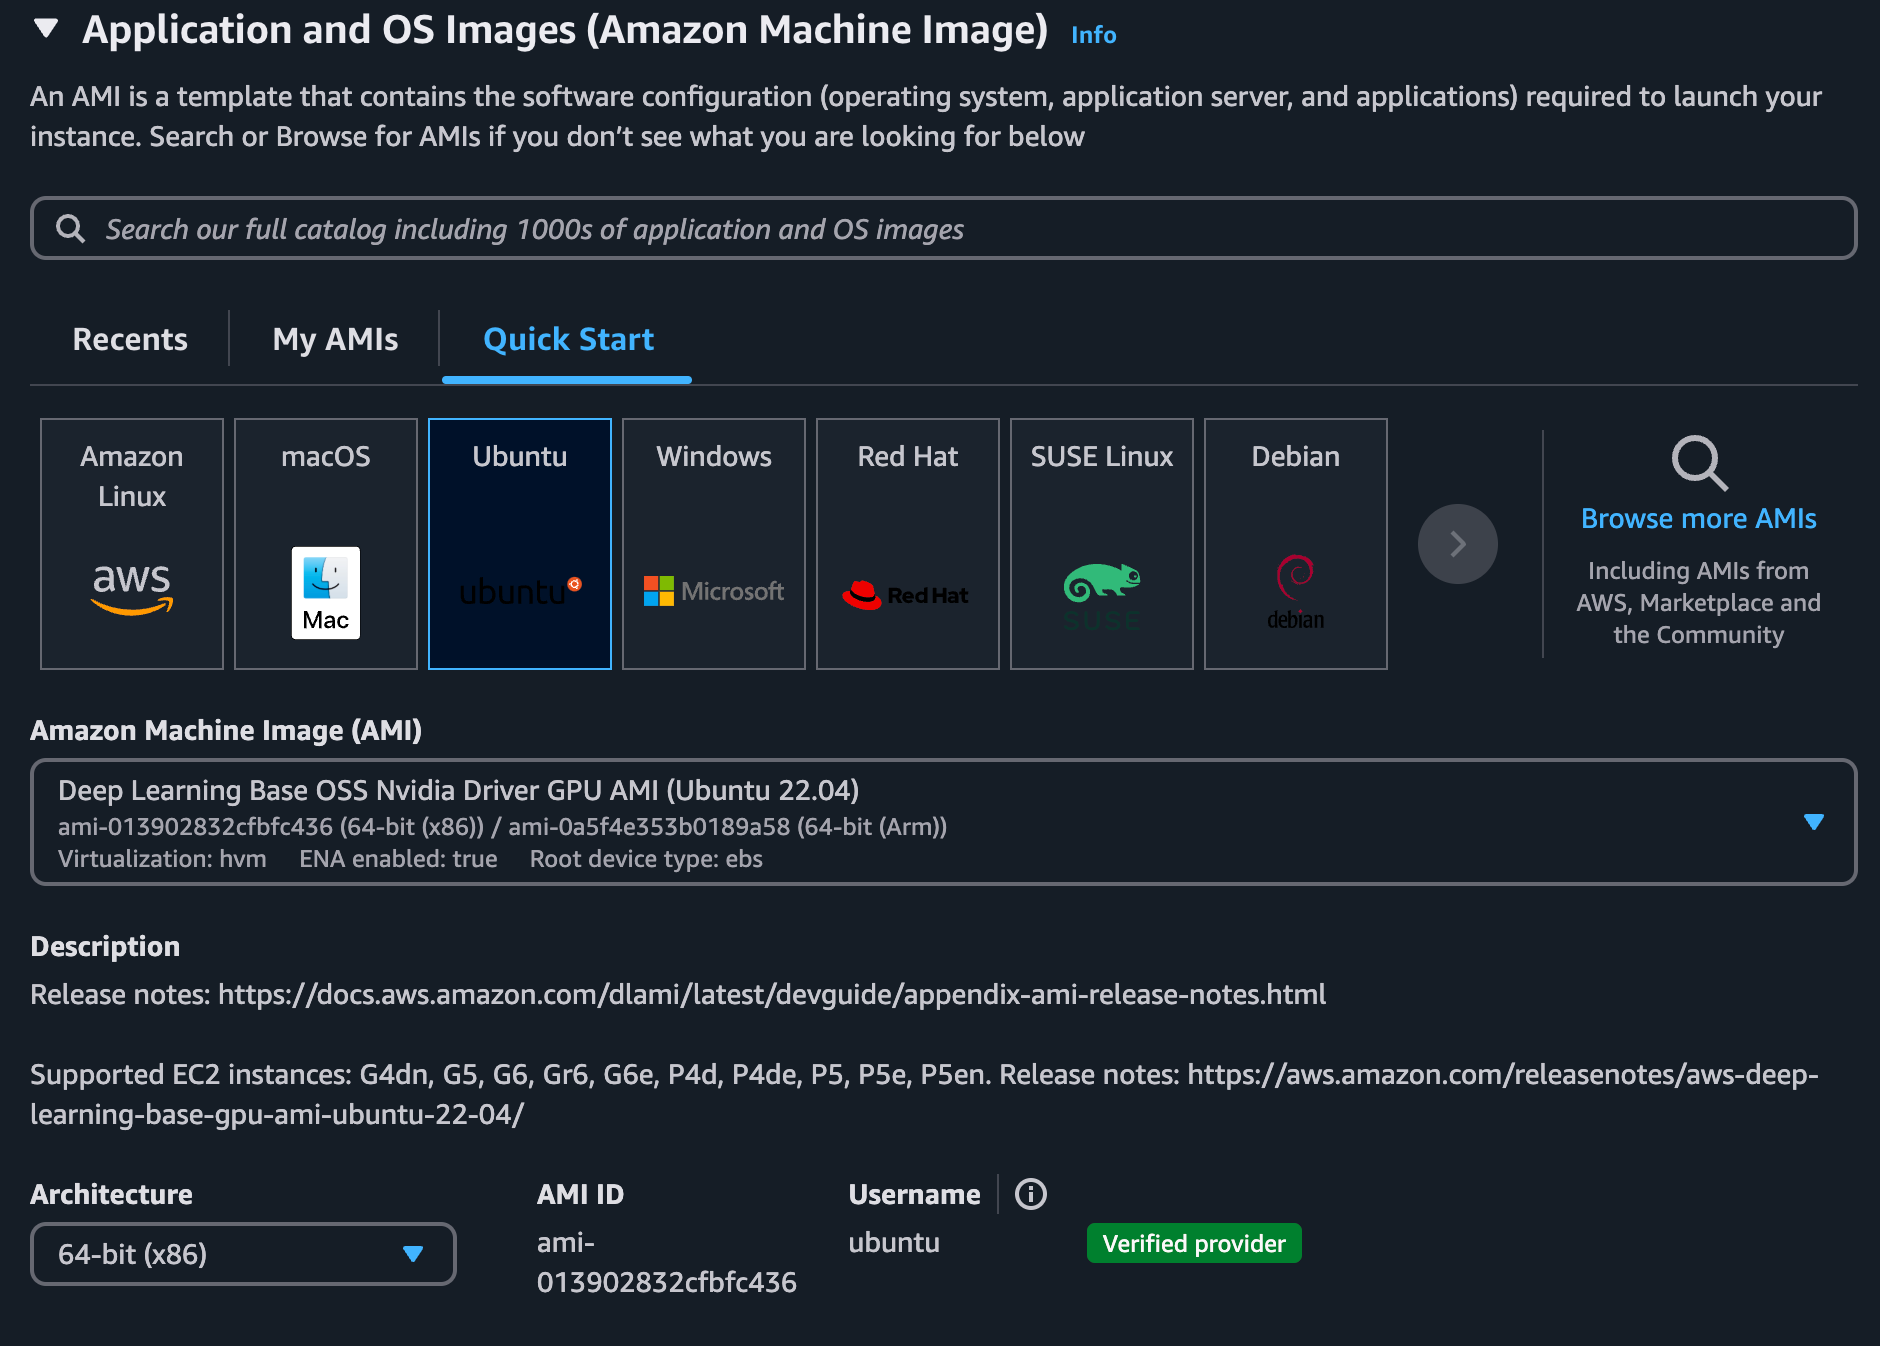
- Select an Appropriate AMI Use the Deep Learning Base OSS Nvidia Driver GPU AMI (Ubuntu 22.04). This AMI comes pre-installed with Nvidia drivers, reducing setup time and ensuring compatibility with GPU-optimized workloads.
- Choose EC2 Instance Type The memory requirements for DeepSeek R1 vary significantly depending on your use case:
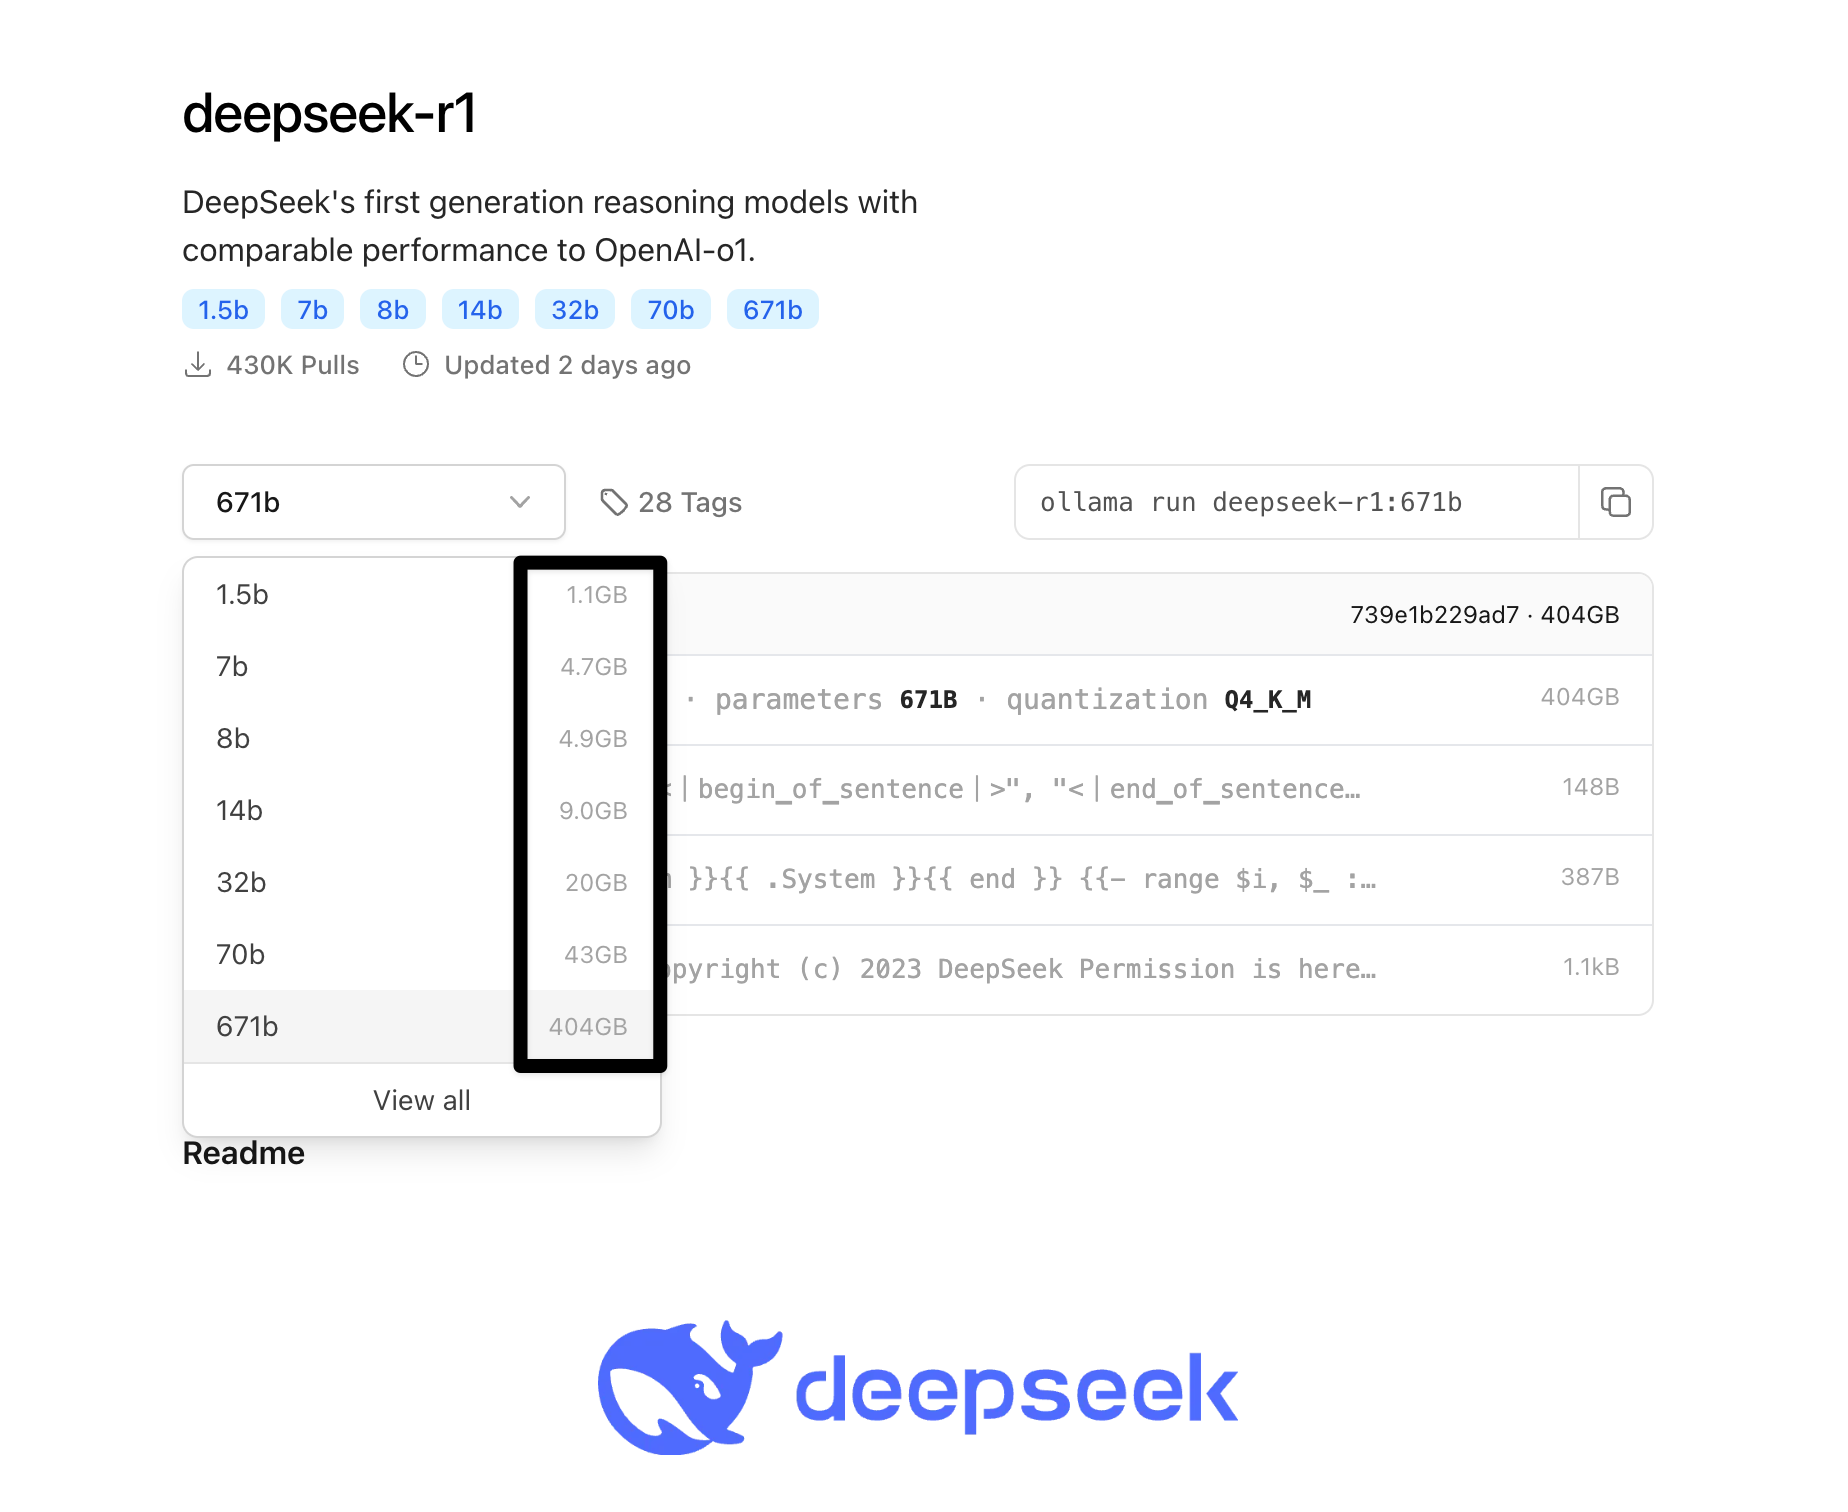
- Minimum: 1.1GB of memory
- Maximum: 404GB of memory Select an instance type that meets your specific model requirements, such as
g4dn.xlargefor basic GPU workloads orp4d.24xlargefor memory-intensive tasks. I choosedg4dn.xlarge
Step 2: Installing Ollama and DeepSeek
Update System Packages
sudo apt updateInstall Ollama Ollama is required to run DeepSeek models. Install it by running:
sudo apt update
curl -fsSL https://ollama.com/install.sh | sh
Run DeepSeek R1 Use the following command to start the DeepSeek R1 model (replace 14b with the desired model version):
ollama run deepseek-r1:14b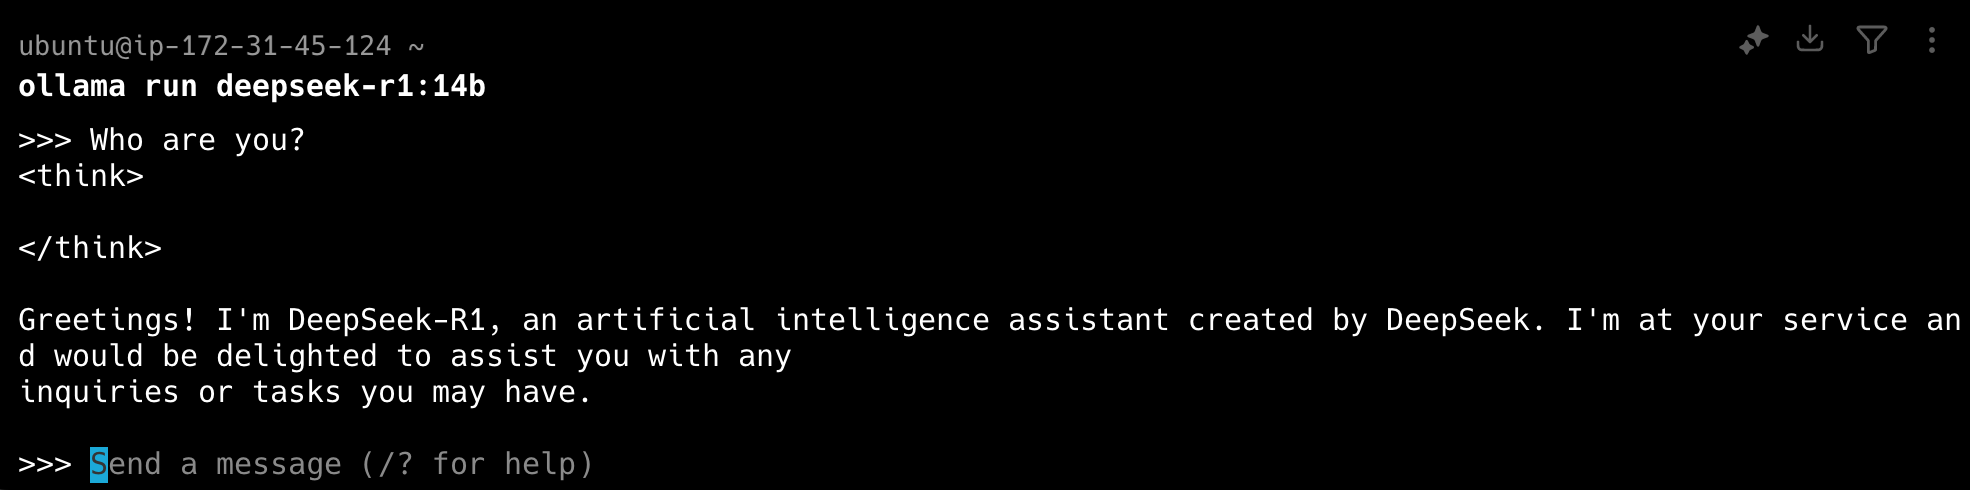
Verify Local API To confirm that the model is running, execute:
curl http://localhost:11434/v1/modelsExpected response:
{
    "object": "list",
    "data": [
        {"id": "deepseek-r1:14b", "object": "model", "created": 1737748240, "owned_by": "library"}
    ]
}
Step 3: Setting Up Nginx as a Reverse Proxy
Install Nginx
sudo apt install nginxAllow HTTP Traffic
sudo ufw allow 'Nginx HTTP'Edit Nginx Configuration Navigate to the configuration file:
cd /etc/nginx/sites-available
sudo vi default
Add the following configuration:
server {
    listen 80;

    location / {
        proxy_pass http://localhost:11434;
        proxy_set_header Host localhost:11434;

        # Handle CORS preflight requests
        if ($request_method = OPTIONS) {
            add_header Access-Control-Allow-Origin *;
            add_header Access-Control-Allow-Methods *;
            add_header Access-Control-Allow-Headers "Content-Type, Authorization";
            add_header Access-Control-Max-Age 3600;
            return 200;
        }

        # Set CORS headers for all other responses
        add_header Access-Control-Allow-Origin *;
        add_header Access-Control-Allow-Methods *;
        add_header Access-Control-Allow-Headers "Content-Type, Authorization";

        proxy_set_header Origin "";
        proxy_set_header Referer "";
    }
}
Restart Nginx
sudo systemctl restart nginxStep 4: Configuring TypingMind Integration
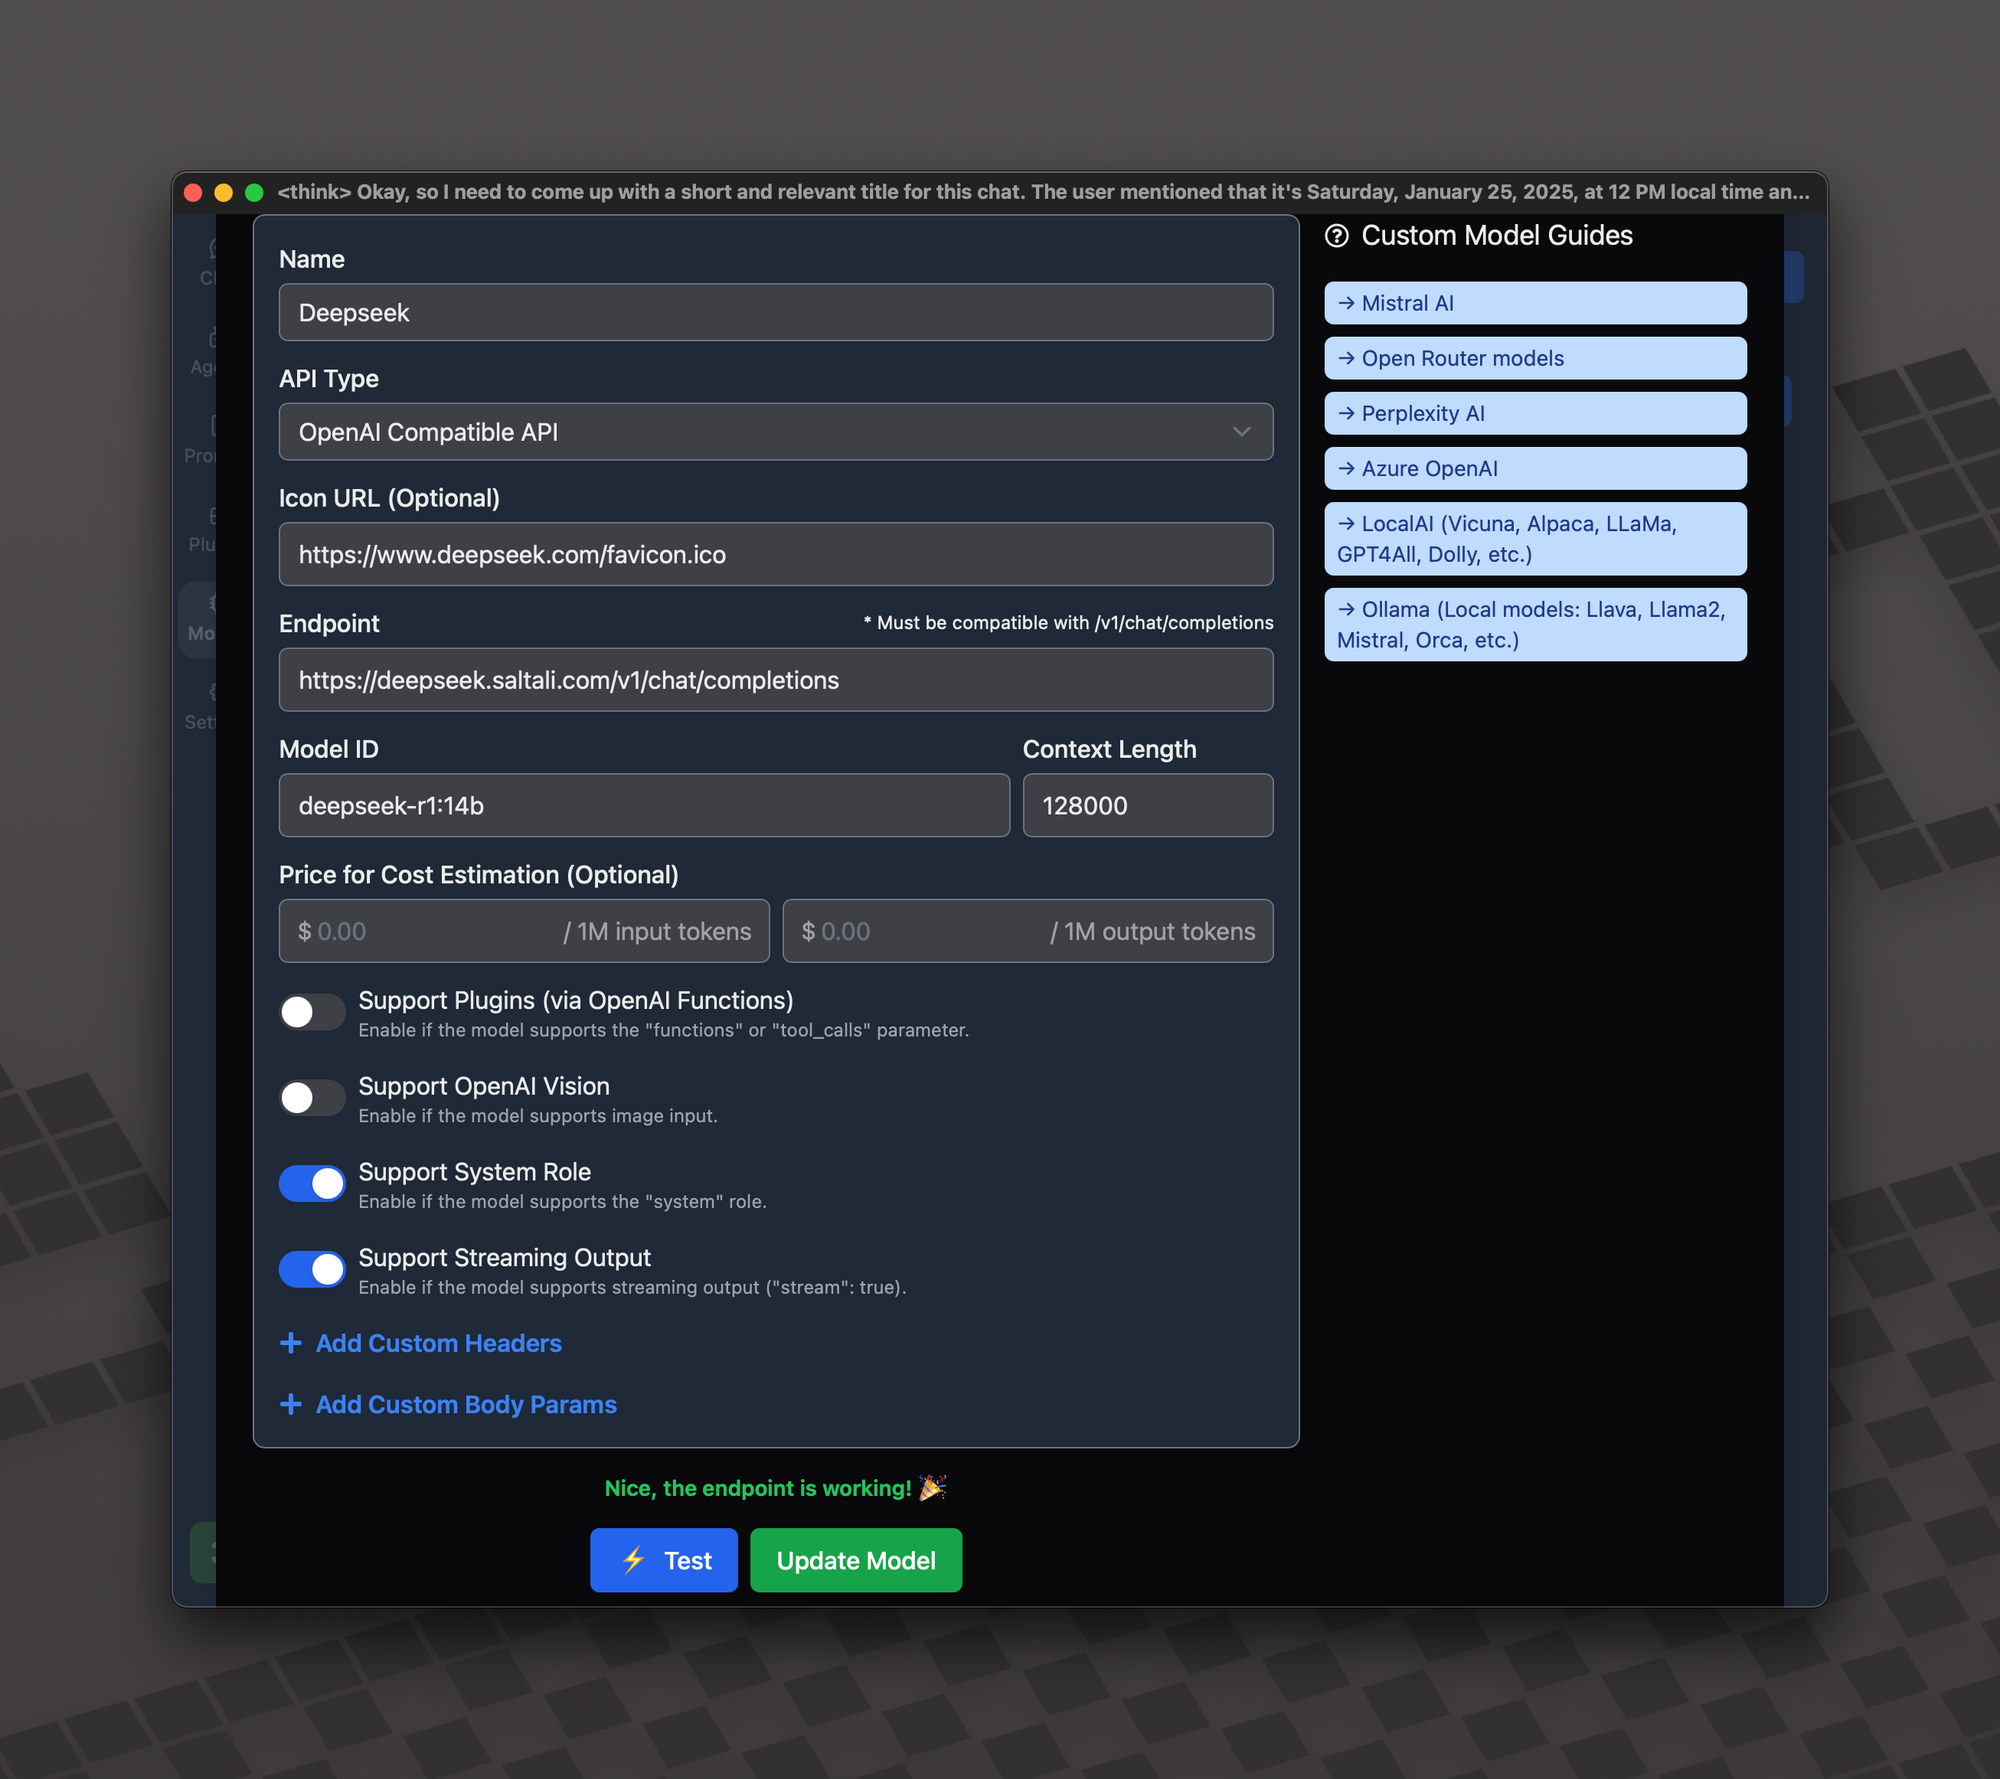
- Setup DNS Record To ensure TypingMind works seamlessly, create an A record in your DNS settings, pointing
deepseek.yourdomain.comto your EC2 instance’s public IP. This step resolves potential CORS issues that occur when using an IP address directly. - Verify Integration Add the DeepSeek R1 model to TypingMind using the DNS name (
deepseek.yourdomain.com) as the endpoint.From this point forward, you can enjoy using TypingMind with your custom DeepSeek server, leveraging the power of Nvidia GPUs for high-performance machine learning tasks.
From now on you can use TypingMind with own deepseek server.